Autofocus Tune up – How To Calibrate Autofocus Settings
I recently upgraded to a camera body that allows for autofocus fine tune adjustments. I tried out different techniques for honing in on the best possible focus settings. Here I’ll share what I learned and how you can measure and adjust your autofocus yourself. All you need is a camera that has the ability to fine tune autofocus. If you are not sure if your camera has it, check the manual or this (slightly out of date) list: http://www.ephotozine.com/forums/topic/af-fine-tuning—does-you-camera-have-it–99222. Most mid-range and higher camera bodies have this feature. Most entry-level bodies do not.
If you are questioning the importance of utilizing the fine tune feature, here is a great article on why autofocus fine tuning is useful: http://www.lensrentals.com/blog/2008/12/this-lens-is-soft-and-other-myths. Since each camera and lens are ever so slightly different, fine tuning the focus allows for optimally matching a lens to a specific camera body.
I first tried a method I read about called “dot tune”. For this you set the camera on a tripod and focus on an object with high contrast. Instead of actually taking photos, the camera focus indicator is used to determine if the lens is front or back focusing. I found this method to be hit or miss with my camera and it did not yield a consistent improvement.
The method that worked for me was printing out a focus target, shooting pictures, and comparing the resulting photos on a computer. I printed out a focus test chart and followed the directions from here: http://regex.info/blog/photo-tech/focus-chart.

Correct Focus
I found the 5% chart (from the linked website) worked best for me. I printed it out and taped it to a hardcover book and set it on a table. I taped a folded business card aligned with the center focus target. I adjusted this card to be perpendicular to my camera for the test shots. Initially I used a tripod and a high shutter speed. Through experimentation I found that the tripod was unnecessary for me. I was able to get consistent results from simply handholding.
I would take a picture with the autofocus on the business card, which was aligned with the center “zero line” of the chart. Then I would review the image on the computer to see how the depth of field was centered. Ideally the zero point was in sharpest focus with numbers in both front and back directions becoming out of focus. I used the largest aperture (lowest f-stop) for the test shots to achieve the shallowest depth of field. This helped to exaggerate the out of focus effect and make it easier to detect front or back focus.
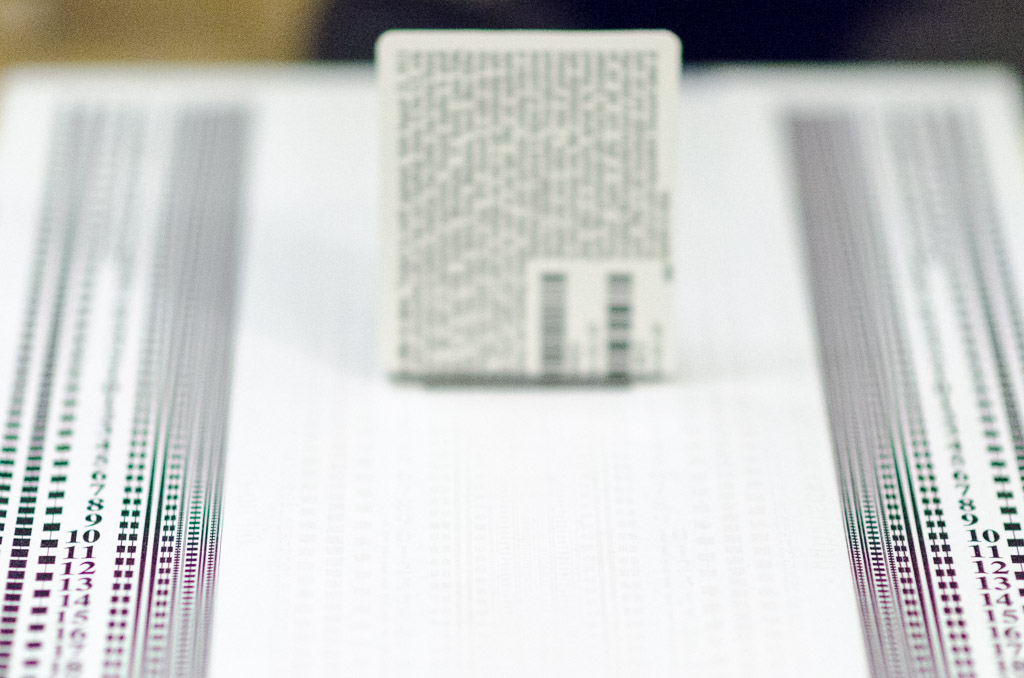
Front Focus – Needs Adjustment
After reviewing the pictures I would go into the camera menu and adjust the fine tune focus + / – if I needed to adjust where the focal plane was set. After several iterations I was happy with the adjustments. The final settings for my 5 lenses were: 0, -4, 0, +3, -5. As you can see, some of the lenses needed no adjustment but a few needed slight tweaks. The adjustment range on my camera is -20 to +20, so the adjustments I needed were modest. However, I was able to see notice the difference between the optimal setting and the default (0) setting.
I recommend using the fine tune feature if your camera body is so equipped. It takes a bit of time but it should only need to be done once. It is a great way to ensure you are taking the sharpest pictures possible, which is especially important if you prefer shallow depth of field.
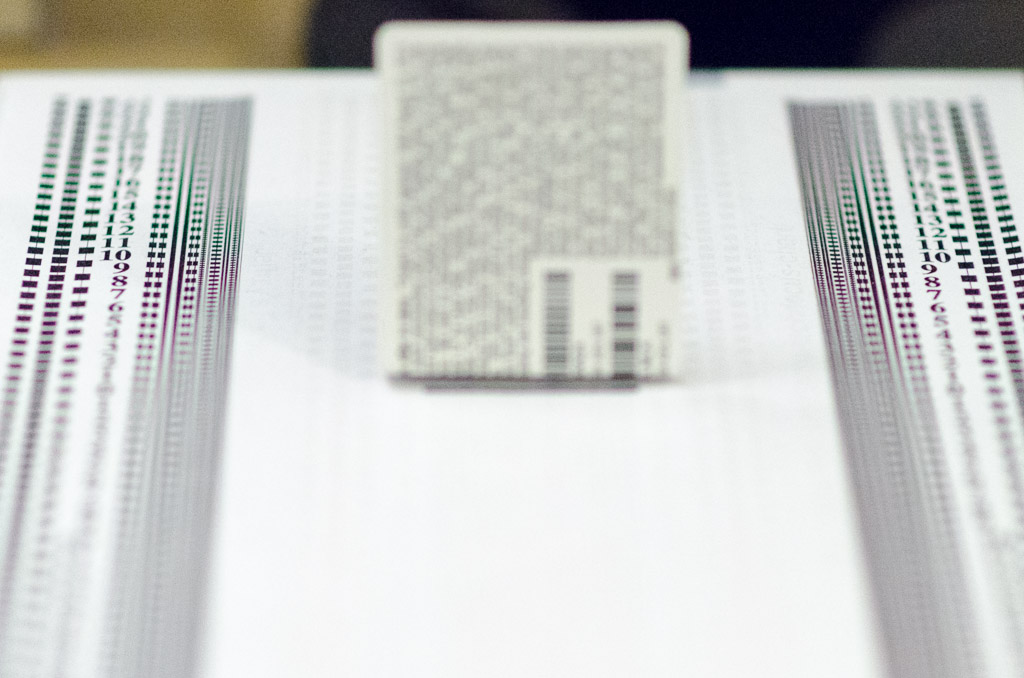
Back Focus – Needs Adjustment